Table of Contents
Whether you’re a DIY enthusiast upgrading your home or a professional installer working on a new build, knowing how to run conduit through walls is essential for both aesthetics and safety. Proper conduit installation not only protects your electrical wiring from damage, moisture, and interference, but it also ensures compliance with building codes – an important factor in both residential and commercial projects.
This comprehensive guide walks you through everything you need to know about running conduit through walls, from planning to final touches. You’ll learn:
- What conduit is and why it matters in modern electrical systems
- The different types of conduit (metallic, non-metallic, rigid, flexible) and which are best for in-wall installations
- How to stay compliant with NEC and other regional electrical codes
- Step-by-step instructions for planning, measuring, drilling, and installing
- Safety precautions and tool recommendations
- How to troubleshoot tricky scenarios like corners, fire-rated walls, or retrofitting
- When to call a licensed electrician for help
- And a brief look at underground conduit runs and trusted product options like Ledes conduit systems
What Is Electrical Conduit
Electrical conduit is a protective tubing designed to route and safeguard electrical wiring. Think of it as a durable shell that shields wires from physical damage, moisture, heat, and electromagnetic interference. It also helps keep installations neat and organized, especially in environments where aesthetics and accessibility are important.
Why Electrical Conduit Matters
Proper use of conduit isn’t just about keeping things tidy, it’s about safety, longevity, and compliance:
- Fire Protection: Conduit helps contain electrical sparks or heat, reducing the risk of fire spread, especially when installed within or through flammable wall materials.
- Mechanical Protection: Wires are vulnerable to punctures, pinches, or abrasion from nails, screws, or sharp surfaces inside walls. Conduit provides a physical barrier.
- Moisture and Corrosion Resistance: In damp or outdoor environments, conduit prevents wire insulation from breaking down due to moisture or chemical exposure.
- Code Compliance: Most building codes, including the National Electrical Code (NEC), require conduit in specific situations to meet safety standards.
- Future Maintenance: Running conduit makes it easier to replace or upgrade wiring later without tearing down walls.
Why Run Conduit Through Walls?
There are several scenarios where running conduit through walls is not only practical—but often necessary:
- Aesthetic Improvements: Concealed conduit creates a clean, seamless look without visible wire clutter.
- Safety & Code Requirements: In finished spaces or multi-family units, running exposed wires may violate local code.
- Remodels & Retrofits: When upgrading or expanding circuits, routing new conduit through walls can avoid surface-mount clutter or damage to existing finishes.
- Protection in High-Traffic or Hazardous Areas: In homes, offices, garages, or workshops, wall-routed conduit shields wiring from daily wear and tear.
In short, if you’re serious about doing electrical work that’s safe, compliant, and built to last, conduit through walls is often the smartest route.
Common Types of Electrical Conduit
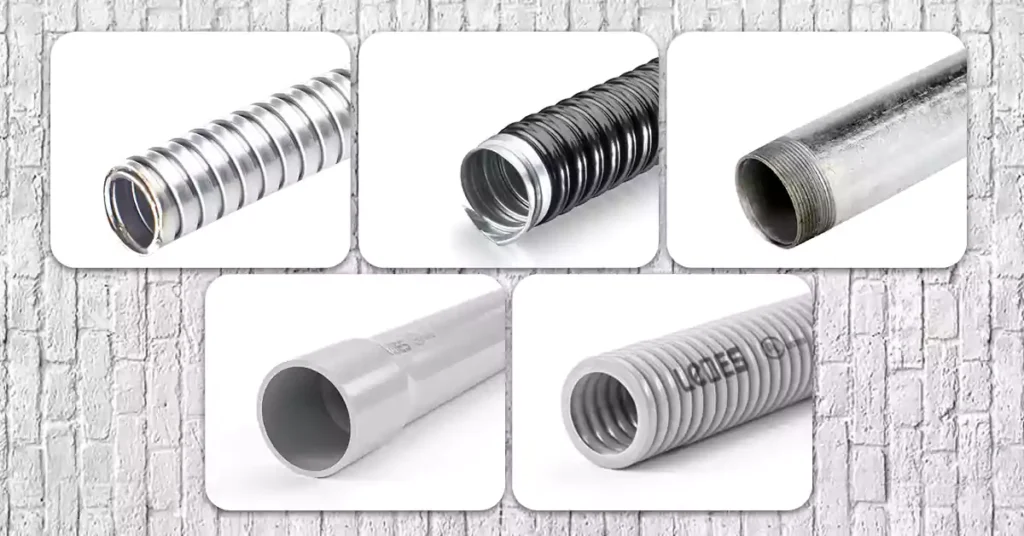
Choosing the right type of conduit is crucial for a successful and code-compliant installation, especially when you’re running it through walls. Not all conduit types are created equal, and some are far better suited for in-wall applications than others. In this section, we’ll break down the most common conduit types, including their material, benefits, drawbacks, and typical use cases, and highlight which are best for running through walls.
EMT (Electrical Metallic Tubing)
Material: Galvanized steel or aluminum
Also known as: Thin-wall conduit
Pros:
Lightweight but rigid
Easy to bend with the right tools
Offers good mechanical protection
Non-combustible and suitable for exposed or concealed use
Widely accepted by the NEC for in-wall installations
Cons:
Can corrode in damp environments if not properly treated
Requires cutting and threading tools
Conductive – requires grounding
Best Used For:
Commercial and residential interior walls
Indoor dry locations
Environments where fire resistance and mechanical protection are priorities
RMC (Rigid Metal Conduit)
Material: Galvanized steel or stainless steel
Heavy-wall conduit
Pros:
Extremely durable and impact-resistant
Excellent grounding path
Offers maximum protection for wiring
Suitable for hazardous and outdoor environments
Cons:
Very heavy and more difficult to install
Requires threading and special fittings
More expensive than other options
Best Used For:
Industrial facilities
Service entrances and exposed locations
Areas requiring high mechanical protection
IMC (Intermediate Metal Conduit)
Material: Coated steel
Pros:
Lighter than RMC but still strong
Cost-effective alternative to RMC
NEC-approved for both exposed and concealed (in-wall) applications
Corrosion-resistant coating
Cons:
Heavier than EMT
Requires threading
Conductive – must be grounded
Best Used For:
Commercial and industrial walls
Outdoor and wet environments (with proper fittings)
Rigid PVC Conduit
Material: Rigid plastic (Polyvinyl Chloride)
Pros:
Lightweight and easy to work with
Non-conductive (no grounding needed)
Corrosion-resistant
Inexpensive
Ideal for underground and outdoor use
Cons:
Can become brittle in cold temperatures
Not fire-resistant (must follow code restrictions in wall cavities)
Expands/contracts with temperature changes
Not suitable for use in plenum spaces unless specifically rated
Best Used For:
Underground runs (especially with Schedule 80)
Moist or corrosive environments
Some indoor walls (if allowed by code and protected from heat sources)
ENT (Electrical Nonmetallic Tubing)
Material: Corrugated plastic (usually PVC-based)
Also known as: “Smurf Tube”
Pros:
Lightweight and flexible
Easy to install without special tools
Non-metallic and corrosion-resistant
Can be installed in walls, ceilings, and floors
Approved by NEC for concealed work in dry locations
Cons:
Lower mechanical strength compared to EMT or RMC
Not suitable for exposed locations
Not fire-resistant (requires protection in fire-rated assemblies)
Best Used For:
Residential and light commercial wall installations
Dry interior locations
Tight spaces or curved routing needs
FMC (Flexible Metal Conduit)
Material: Helically wound metal strip
Pros:
Highly flexible—great for navigating bends or vibrations
Provides some mechanical protection
NEC-approved for certain concealed installations
Cons:
Not watertight unless using Liquidtight type
Limited use in long or permanent wall runs
Requires additional grounding
Can be noisy in vibrating environments
Best Used For:
Final connections to equipment
Short, flexible runs inside walls (e.g., between boxes and panels)
LFMC (Liquidtight Flexible Metal Conduit)
Material: Flexible metal with waterproof thermoplastic coating
Pros:
Water-resistant
Good flexibility and durability
Suitable for outdoor and damp environments
Some fire resistance depending on rating
Cons:
Bulkier and harder to route through tight walls
More expensive than standard FMC
Best Used For:
Outdoor or wet-area connections
Condensers, pumps, or AC units
Limited interior wall use (typically at entry/exit points)
Pro Tips: Want to learn the pros and cons of all top 10 types of electrical conduit? Click the link above to read our expert guide.
✅ Best Conduits for Running Through Walls
When it comes to running conduit through walls, the most commonly accepted and effective types include:
EMT – Ideal balance of protection, ease of use, and code compliance
IMC – A tougher alternative to EMT for industrial or outdoor wall runs
ENT – Suitable for running through walls in dry, protected environments, quick installations
PVC – Use with caution; suitable only if code allows and proper fire barriers are used
Code Requirements for Running Conduit Through Walls
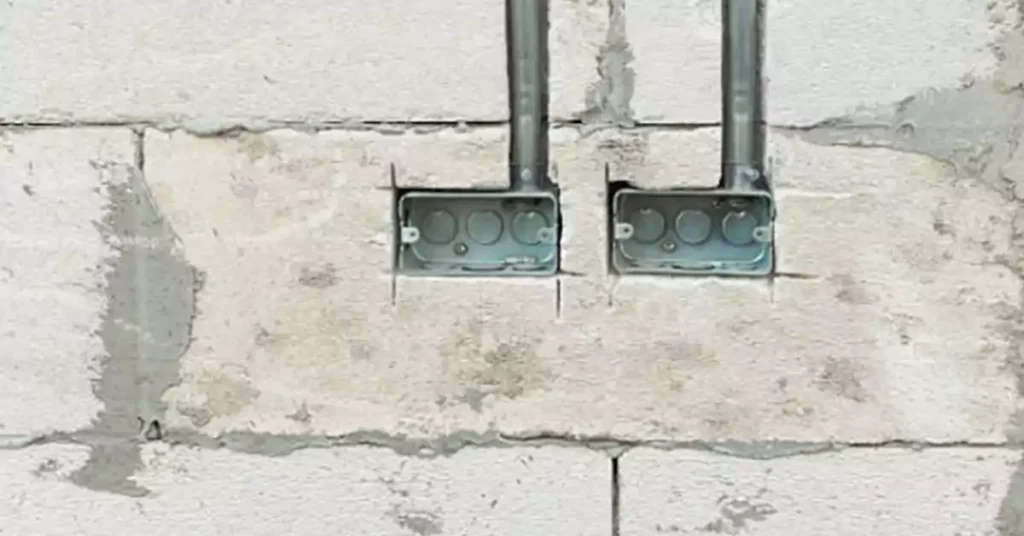
Before grabbing your tools, it’s critical to understand the electrical code requirements that govern conduit installations through walls. These codes aren’t just formalities, they exist to ensure safety, fire prevention, mechanical protection, and long-term system performance. Whether you’re doing a DIY home upgrade or working on a commercial job site, compliance with the National Electrical Code (NEC) and local building codes is a must.
NEC Rules for Concealed Conduit Runs
The National Electrical Code (NEC) lays out the general rules for installing conduit in walls. Here are some key takeaways:
1. Secure Support & Spacing Requirements
Conduit must be securely fastened within 3 feet (0.91 m) of each electrical box and at regular intervals along its run.
For most conduit types (like EMT or PVC), support spacing is typically every 10 feet or less—refer to specific code tables per conduit type.
2. Protection Against Physical Damage
If conduit passes through wood or metal studs, protection plates (nail guards) are often required to prevent screw or nail penetration.
The NEC typically requires 1¼ inches of space from the edge of framing members for embedded conduit—otherwise, a protective plate must be installed.
3. Fire-Rated Assemblies & Firestopping
If you’re running conduit through fire-rated walls or floors (common in multi-family, commercial, or apartment buildings), you must use approved firestop materials to restore the wall’s fire resistance rating.
The firestop system must be UL-listed or approved by local code authorities.
4. Conduit Fill Limits
When running multiple wires through a single conduit, you must follow conduit fill tables in the NEC (Annex C or Chapter 9, Table 1).
Overfilling a conduit can cause overheating, insulation damage, or failed inspections.
5. Bends and Pulling Rules
The total angle of bends between pull points (boxes, fittings, etc.) must not exceed 360 degrees.
A conduit that runs through a wall cavity with multiple turns must still comply with this limit.
6. Grounding and Bonding Requirements
For metallic conduit systems (e.g., EMT, RMC, IMC, FMC):
Grounding is required. The metal conduit can serve as a grounding path, but all fittings must be tight and secure to maintain electrical continuity.
Bonding jumpers may be required across couplings or boxes where continuity might be broken.
7. Conduit Temperature Ratings
Each type of conduit and wiring must be rated for the expected temperature:
Conductors must not exceed the temperature rating of the conduit system or fittings.
Be especially cautious when running conduit through areas like attics, crawlspaces, or near heating ducts.
8. Expansion and Contraction Considerations
For PVC conduit, especially when run through long spans or between temperature-variable areas (e.g., from a cold wall cavity into a heated room):
Expansion fittings must be installed to account for thermal movement.
Anchoring both ends without allowing for movement can cause warping or joint failure.
9. Use in Plenum Spaces
When running conduit through walls that connect to plenum spaces (e.g., air-handling spaces above ceilings or below floors), the materials used must meet plenum-rated fire and smoke standards.
PVC and ENT are not permitted in plenum spaces unless they are specifically listed for such use.
Metallic conduit is generally acceptable in these areas.
Tips: Click here to read the ultimate guide to NEC code 2025 to ensure your wiring installation is correct.
Local Code Considerations
While the NEC provides a national baseline, local jurisdictions may have their own rules. Common local requirements include:
- Special firestopping materials approved by the Authority Having Jurisdiction (AHJ)
- Restrictions on plastic conduit in certain buildings
- Required permits and inspections for in-wall electrical work
Always check with your local building department before starting a project. A simple call or online inquiry can prevent costly rework later.
Canadian Electrical Code (CEC)
The CEC, used across Canada, is closely aligned with the NEC in many ways, here are some key and common requirements for conduits run through walls;
- Conduit support spacing and secure mounting are required (e.g., EMT must be supported at intervals not exceeding 1.5 m).
- Conduit must be protected from physical damage when passing through wood or metal framing.
- Conduit fill, bending radius, and maximum bend angles must comply with specific limits (e.g., total bends not exceeding 360° between pull points).
- Fire stopping is required when conduit penetrates fire-rated walls, floors, or ceilings.
Pro Tips: Looking to start your electrical distribution business in Canada? Take some time to review the latest CEC guidance to ensure your products and business expand smoothly in Canada.
AS/NZS 3000 (Australian/New Zealand Wiring Rules)
If your audience includes Australian readers, the AS/NZS 3000 standard (also known as the Wiring Rules) includes some guidance for conduit in walls:
- Conduit passing through walls must be installed in a way that maintains mechanical protection and fire barriers.
- Metal or plastic conduit must not compromise the integrity of fire-rated construction.
- Boxes and fittings must remain accessible, unless the conduit terminates at a fixed appliance.
Notes: Not knowledgeable with AS/NZS 3000? No problem! Simply read our expert guide to AS/NZS 3000 to quickly train yourself with the electrical code and improve your business’s performance in Australia.
Pre-Installation Planning & Safety Protocols
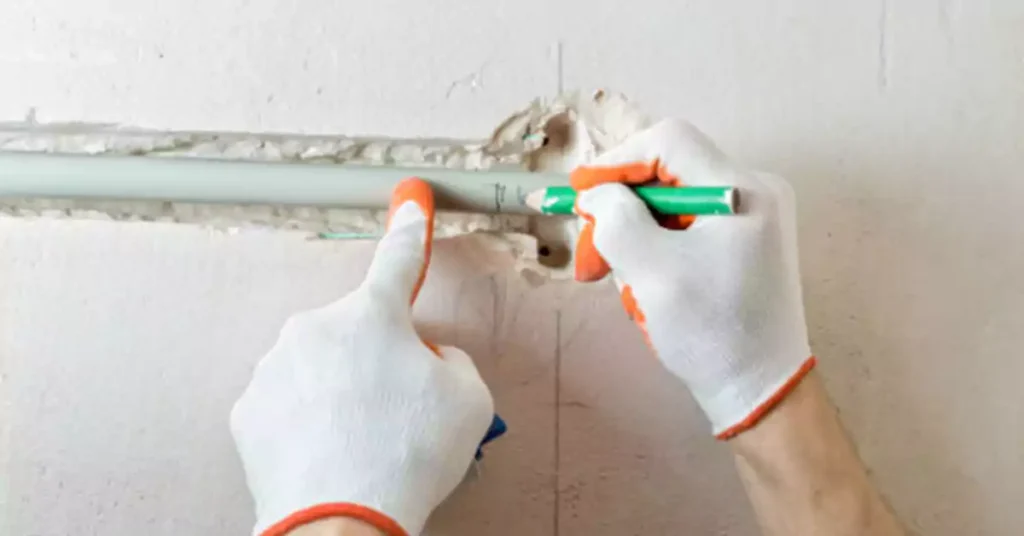
Before cutting into walls or feeding conduit through tight spaces, it’s critical to approach the job with a well-thought-out plan, and a firm focus on safety. Skipping these steps can lead to damaged walls, failed inspections, or even serious injury.
1. Understand Your Walls
Running conduit through a wall starts with understanding the wall structure itself. Different wall types require different techniques, tools, and precautions.
• Stud Walls (Wood or Metal Framing)
Most common in residential and light commercial buildings.
Conduit is typically routed between studs, either vertically (floor to ceiling) or horizontally (between outlets/switches).
Use a stud finder to map framing and avoid drilling into structural or load-bearing members unless allowed.
You must keep conduit at least 1¼ inches away from the surface to prevent drywall screws or nails from puncturing it, use protection plates if needed.
• Masonry or Concrete Walls
Common in basements, commercial buildings, or older homes.
Surface-mounted conduit (e.g., EMT or PVC) is typically used unless chases are built into the wall.
Use hammer drills with masonry bits for any penetration, and ensure all fasteners are designed for concrete anchoring.
Identifying Hidden Obstructions
Use wall scanners or multi-sensor stud finders that can detect:
Water or gas pipes
Electrical cables
HVAC ducts
Reinforcing bars in concrete (rebar)
Mark all detected obstacles clearly before drilling. Damaging pipes or live wires can lead to injury, costly repairs, or both.
2. Electrical Code Compliance: Know Before You Drill
Electrical codes like the NEC (U.S.), CEC (Canada), and others exist for your safety, and failing to follow them can mean rework, fines, or dangerous installations.
• Key Code Considerations
Conduit Fill: Use conductor fill tables to avoid overheating. Don’t overcrowd conduit.
Bend Radius & Limitations: Total bends between pull points must not exceed 360°.
Support Spacing: Follow the code requirements for support distance.
Bonding & Grounding: Metallic conduit must be properly bonded to ensure electrical continuity.
Firestop & Sealing: Any penetrations through fire-rated walls require approved firestop sealants or gaskets.
• Permits & Inspections
Many jurisdictions require permits for in-wall conduit runs, especially if:
You’re adding new circuits.
Running conduit through fire-rated or load-bearing walls.
Always check with your local AHJ (Authority Having Jurisdiction) for inspection timelines and documentation requirements.
3. Safety First: It’s Not Optional
Electrical work is dangerous when shortcuts are taken. Protecting yourself and your space should always be the first priority.
• Power Shutdown & Verification
Always turn off power at the breaker panel before any electrical work.
Use a non-contact voltage tester or multimeter to verify the power is off at the work area.
If working near other circuits, de-energize those too when possible.
• Personal Protective Equipment (PPE)
Safety glasses to protect from dust, flying debris, or wire strands.
Insulated gloves when handling wire or working near panels.
Dust masks if cutting drywall, especially in enclosed spaces.
• Ladder Safety
Use ladders on stable surfaces only—never overreach.
Maintain three points of contact (two hands and one foot, or two feet and one hand).
Don’t place ladders near energized equipment.
❗ Avoid These Common Hazards:
Drilling blindly through walls—always inspect first.
Working in damp areas without GFCI protection.
Overloading a conduit with too many bends or conductors.
4. Mapping Out Your Conduit Run
A well-planned route saves time, reduces the need for couplings or fittings, and makes future maintenance easier.
• Plan the Most Efficient Path
Choose wall cavities that align with the desired outlet or box locations.
Avoid load-bearing studs or post-tension cables (especially in concrete walls).
• Consider Future Access
Use pull boxes in longer runs or where changes may be needed later.
Keep conduit slightly oversized to allow for future wiring changes.
• Mark and Measure
Use a level and chalk line to mark horizontal or vertical conduit paths.
Clearly mark cutouts for outlet boxes or junctions before cutting into the wall.
Measure twice, drill once.
Tools & Materials Checklist
Here’s a basic list to get started:
Category | Examples |
Conduit Types | EMT, PVC, IMC, ENT (as appropriate) |
Inspection Tools | Stud finder, multi-scanner, voltage tester |
Cutting Tools | Hole saws, spade bits, hammer drill (for masonry) |
Fishing Tools | Fish tape, glow rods, string with vacuum assist |
Layout Tools | Tape measure, level, chalk line |
PPE | Gloves, goggles, dust mask, ear protection |
Ladders | Fiberglass ladders preferred near electrical work |
How to Run Conduit Through Walls – Step-by-Step Guide
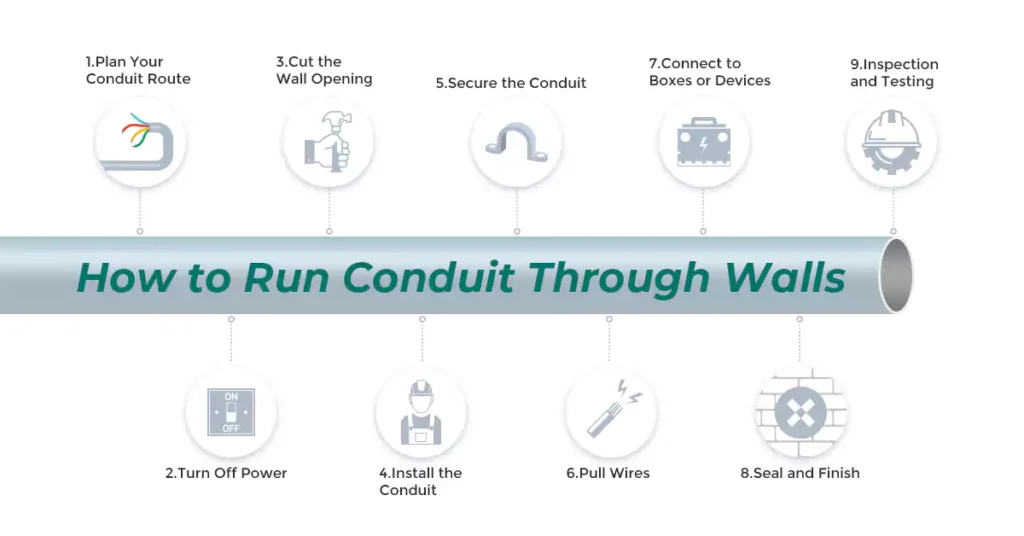
Running conduit through a wall, whether it’s interior drywall or an exterior surface, requires precision, planning, and code-compliant installation. Below is a general step-by-step guide to help you safely and correctly complete the task.
Step 1: Plan Your Conduit Route
- Mark the entry and exit points where the conduit will pass through the wall.
- Check for obstructions inside the wall (pipes, studs, existing wires) using a stud finder or inspection camera.
- Choose the appropriate conduit type:
PVC or EMT for indoor, concealed wall runs.
Liquid-tight or flexible metal conduit (FMC) if flexibility is needed in tight spots.
- Select the correct conduit size, ensuring it meets the fill capacity for the number and gauge of conductors.
Step 2: Turn Off Power
Before any cutting or wiring begins:
Shut off the power at the breaker panel to avoid shock hazards.
Use a non-contact voltage tester to confirm circuits are de-energized.
Step 3: Cut the Wall Opening
For drywall or wood: Use a hole saw or spade bit to bore a hole slightly larger than the conduit diameter.
For masonry or concrete: Use a hammer drill with a masonry bit. For larger holes, use a core drill.
Ensure the hole is:
Neat and clean.
Sized correctly for the conduit plus any required bushing or sleeve.
Note: If fire-resistance rating of the wall must be preserved, use firestop systems or fire-rated sleeves as required by building/fire codes.
Step 4: Install the Conduit
Measure and cut the conduit to length using a hacksaw (PVC) or tubing cutter (EMT).
Deburr sharp edges using a deburring tool or file.
Dry fit the sections first to ensure alignment.
Run the conduit through the hole, from one side to the other.
- Through Wood or Drywall:
You can run conduit directly through the hole.
Use a plastic bushing or connector to protect the cable from abrasion at entry/exit points.
- Through Concrete or Brick:
Consider using a sleeve (e.g., larger diameter PVC) and sealing the space with non-shrinking grout or urethane sealant.
Seal both ends if exposed to moisture.
Step 5: Secure the Conduit
Use conduit straps or clamps to anchor the conduit within code-required intervals (e.g., within 3 ft of each box, and every 10 ft for PVC per NEC 352.30).
Ensure the conduit is level, flush, and not under tension.
Step 6: Pull Wires
Use fish tape or a pull string to guide wires through the conduit.
Apply wire-pulling lubricant if needed, especially for long runs or bends.
Don’t exceed conduit fill capacity (refer to NEC Chapter 9, Table 1, or CEC Section 12).
Step 7: Connect to Boxes or Devices
Securely attach the conduit to the outlet box, junction box, or enclosure using the correct adapter or connector (e.g., male terminal adapter, compression fitting).
Ensure continuity of grounding if using metal conduit like EMT.
Step 8: Seal and Finish
Use caulk or sealant (fire-rated if needed) around conduit penetrations in fire-rated walls.
For exterior walls, use weatherproof fittings and sealants to prevent water intrusion.
If the conduit passes through an air barrier or vapor barrier, use appropriate sealants or sleeves to maintain envelope integrity.
Step 9: Inspection and Testing
If required, call for electrical inspection before energizing.
Test continuity, polarity, and insulation resistance after wiring.
Common Mistakes & Maintenance Tips
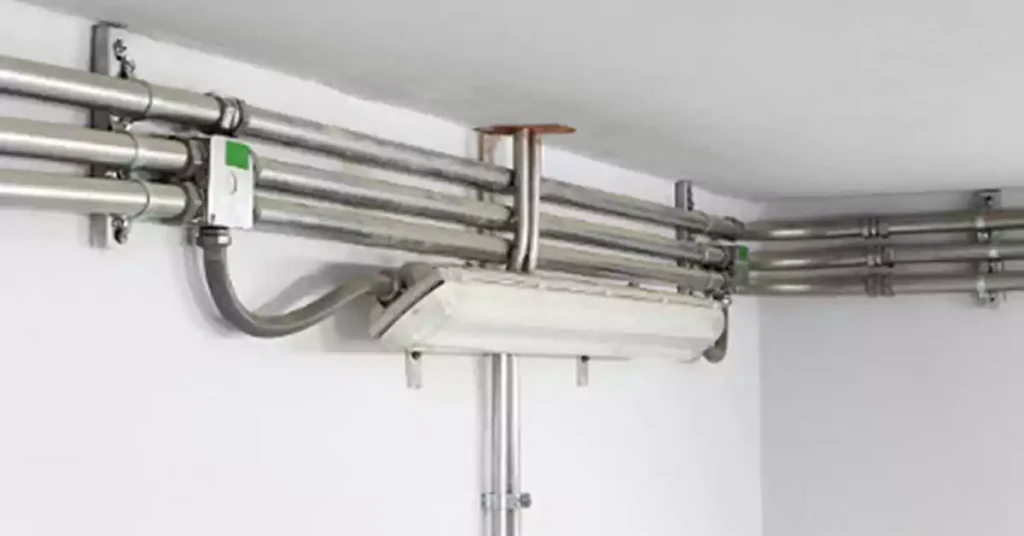
Even with a solid plan, small oversights can cause major headaches, either immediately or years down the road. Knowing the most frequent mistakes and how to prevent them can save you from failed inspections, costly repairs, or unsafe conditions. And once your conduit is installed, basic maintenance keeps it safe and functional for decades.
7 Common Mistakes Need to Avoid
1. Ignoring Electrical Code Requirements
Overfilled conduit, unsupported runs, or excessive bends will fail inspection and make pulling wire nearly impossible.
2. Choosing the Wrong Conduit Type
Using flexible conduit inside a wall cavity where code requires rigid metallic or nonmetallic conduit.
Using indoor-rated PVC for an exterior wall penetration, leading to UV damage and brittleness.
3. Skipping Deburring
Sharp conduit edges can slice insulation during wire pulls, creating hidden faults.
Always smooth cut ends with a file or deburring tool.
4. Poor Sealing at Penetrations
Gaps around conduit where it passes through a wall can allow pests, moisture, or air leaks.
In fire-rated assemblies, failing to use firestop sealants is both unsafe and a code violation.
5. Improper Grounding or Bonding
Metallic conduit that isn’t bonded properly can become energized in a fault condition, posing shock hazards.
6. Routing Through Load-Bearing Structural Elements
Cutting large holes in studs, joists, or beams without reinforcing them can compromise structural integrity.
Always follow building code clearance and boring limitations.
7. Not Labeling Circuits
Skipping wire labeling makes future maintenance and troubleshooting far more difficult.
5 Maintenance Tips for Long-Term Reliability
Unlike exposed cable, conduit systems can last decades if installed and maintained correctly. Here’s how to keep them in top shape:
1. Schedule Periodic Inspections
Every few years, check for:
Loose conduit straps or supports.
Corrosion on metal conduit.
Cracks or brittleness in PVC.
Moisture accumulation in boxes or fittings.
2. Protect Against Corrosion
For EMT or rigid metallic conduit in damp locations, apply anti-corrosion coatings or use stainless steel fittings.
Seal exterior penetrations with weatherproof caulking.
3. Check Seals and Firestopping
Inspect firestop materials for deterioration and replace as needed to maintain wall ratings.
4. Monitor for Wire Movement
In areas with vibration (near HVAC or machinery), ensure conduit fittings remain tight and locknuts are secure.
5. Keep Documentation
Maintain a record of:
Conduit routes.
Circuit numbers.
Pull box and junction box locations.
This makes any future upgrades or troubleshooting easier.
When to Call a Professional
Running conduit through walls can be a manageable project for experienced DIYers, but there are situations where calling a licensed electrician is the safer, faster, and more cost-effective option. Knowing your limits can protect you from electrical hazards, failed inspections, and costly mistakes.
1. Lack of Code Knowledge
If you’re not fully familiar with your local electrical code (NEC in the U.S., CEC in Canada, or other regional standards), you risk non-compliance. Code violations can:
Delay your project during inspection.
Create hidden safety hazards.
Require expensive rework.
2. Service Panel Work
Any work involving:
Installing new breakers.
Expanding service capacity.
Modifying the main service entrance.
These are high-risk tasks that require proper training and certification.
3. Running Conduit in Fire-Rated Walls or Ceilings
These installations demand special materials and sealing methods to maintain the fire-resistance rating. Professionals know the exact firestop products and procedures required.
4. Working in Hazardous or Specialized Environments
Such as:
Wet locations (pools, outdoor, basements prone to flooding).
Explosive or flammable atmospheres (workshops, fuel storage areas).
These require specific conduit types, fittings, and sealing techniques.
5. Complicated Routing Through Finished Walls
If conduit must pass through multiple floors, tight spaces, or around structural elements, a pro can save you from unnecessary demolition or damage.
6. Upgrading or Integrating with Old Wiring
Old wiring may have degraded insulation, hidden splices, or outdated grounding. A professional can safely test, replace, or integrate it into a new conduit system.
7. When Permits & Inspections Are Mandatory
In many jurisdictions, permits for certain conduit runs require work by a licensed electrician to pass inspection.
How to Run Conduit Underground
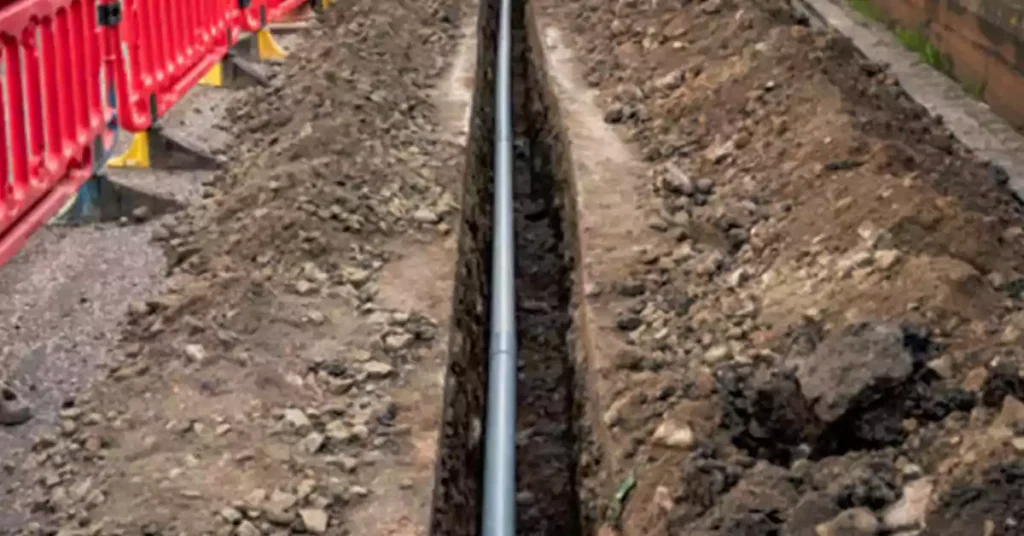
Underground conduit runs are common when you need to bring power to detached garages, sheds, outdoor lighting, or other structures away from your main building. While similar in principle to in-wall conduit runs, underground installations come with their own set of materials, tools, and code requirements to ensure long-term durability and safety.
What to Know Before Installation
A. Choosing the Right Conduit for Underground Use
Not all conduit types are designed to withstand soil contact and moisture exposure. Common code-approved choices include:
PVC Schedule 40 or 80 (Rigid Nonmetallic Conduit)
Direct Burial PVC Conduit, such as DB conduits and EB conduit for concrete encasement
Rigid Metal Conduit
B. Code-Required Burial Depths
The National Electrical Code sets minimum cover requirements (in inches), but always confirm with your local authority since rules may vary.
Step-by-Step: Running Conduit Underground
1. Plan the Route
Choose the most direct path to minimize bends and fittings.
Mark both ends and intermediate waypoints with stakes or spray paint.
2. Check for Utilities
Call your local “call before you dig” hotline (e.g., 811 in the U.S.) to locate underground gas, water, and communication lines.
3. Dig the Trench
Use a trenching shovel or rental trenching machine.
Maintain consistent depth according to code.
Avoid sharp corners — underground bends should be gradual.
4. Lay the Conduit
Dry-fit all sections first.
For PVC, apply primer and solvent cement at each joint.
For RMC, thread and tighten with approved fittings.
5. Install Pull Strings
Before backfilling, run a fish tape through the conduit and leave a pull string for later wire installation.
6. Backfill Properly
Place 4–6 inches of sand or fine soil over conduit to protect it from rocks.
Backfill with excavated soil, tamping gently to prevent settling.
7. Pull the Conductors
Use wire rated for wet locations (e.g., THWN-2).
Apply wire-pulling lubricant for long runs.
Ledes Electrical Conduit Solutions
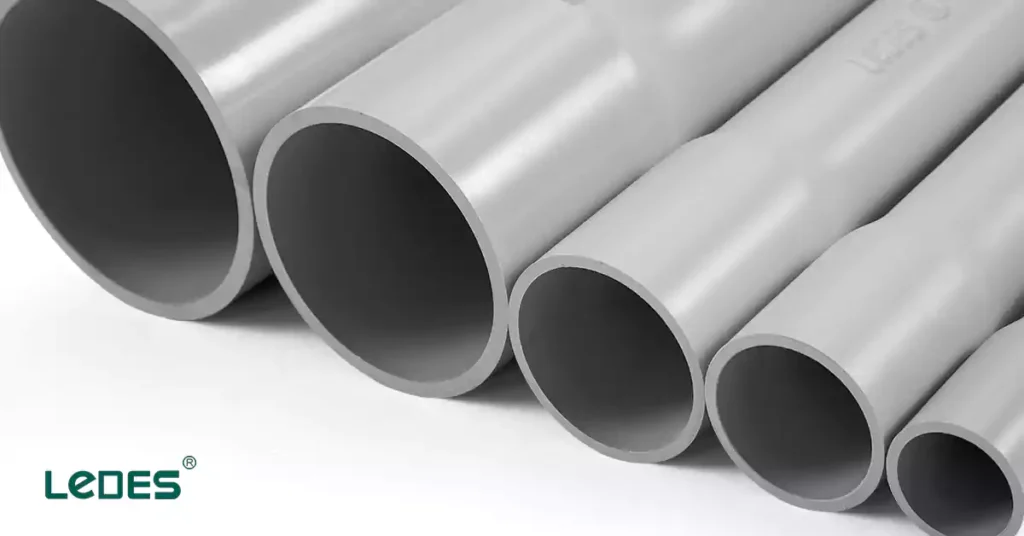
When seeking high-quality, versatile, and code-compliant conduit systems, Ledes stands out as a globally recognized manufacturer. With over 16 years of experience, Ledes has earned a reputation for delivering premium PVC conduit and fittings across diverse sectors—from residential and commercial construction to renewable energy and infrastructure projects
Why Choose Ledes?
- Global Certifications & Standards: Ledes products meet UL, ASTM, CSA, ETL, AS/NZS 2053, IEC, CE, RoHS, and ISO standards, ensuring compliance for a wide range of projects and regions.
- Extensive Product Range: Whether you need rigid or corrugated conduit, flexible ENT, low-smoke halogen-free (LSZH), direct burial ducts, solar-grade conduit, or comprehensive fitting lines, Ledes has you covered.
- Custom Solutions: Ledes offers tailored conduit systems for unique applications, helping streamline project delivery and meet specific installation requirements.
- Proven Quality: UL 651-rated Schedule 40 and 80 conduit from Ledes supports 90 °C wiring, ideal for high-demand applications like EV charging, data centers, and smart buildings.
- Competitive Pricing & Support: With wholesale pricing, direct factory supply, and responsive customer service, Ledes aims to offer efficiency and value, especially for large-scale builds.
Ledes Product Series Highlights
- UL & CSA Conduit Series
Includes rigid PVC conduit (Schedule 40/80), ENT tubing, and direct burial duct options, all meeting North American standards. Ideal for both indoor and underground applications.
- LSZH (Low Smoke Zero Halogen) Series
Designed for maximum safety in fire-prone or sensitive environments (e.g., hospitals, tunnels, schools). Features UL 94 V-0 fire rating, UV resistance, and LSZH conduit production—prioritizing occupant safety and environmental compliance.
- Solar & Outdoor Conduit Series
Built for harsh exterior conditions and solar installations, these solar conduits conform to AS/NZS 2053 and IEC standards, offering UV resistance and durable outdoor performance.
- AS/NZS 2053 PVC Conduit Series
Designed specifically for Australian and New Zealand markets.
Includes rigid and corrugated PVC conduit and fittings certified under AS/NZS 2053 and IEC standards.
Includes a tailored LSZH (Low Smoke Zero Halogen) line suitable for safer, greener builds in Australia.
Conclusion
Running conduit through walls isn’t just about hiding wires, it’s about building safety, durability, and compliance into your electrical system from the start. Whether you’re installing a single outlet or wiring an entire property, following best practices ensures your work stands the test of time.
From understanding conduit types and meeting electrical codes to careful pre-installation planning, safety checks, and precise execution, every step matters. Avoiding common mistakes, and knowing when to call an expert can mean the difference between a smooth inspection and a costly redo.
The bottom line: take the time to plan, use the right materials, and never cut corners on safety or compliance. Do it once, do it right, and your conduit installation will deliver safe, clean, and code-compliant wiring for years to come.
FAQs
Can you run conduit through walls?
Yes. You can run conduit through most wall types as long as you follow your local electrical code. The key is choosing the right conduit type, securing it properly, and maintaining the correct bend radius so wires can be pulled easily. Fire-rated walls require special sealing methods to keep their rating intact.
Can you run PVC conduit inside walls?
Yes, rigid PVC conduit can be used inside walls if it’s listed for that purpose. Schedule 40 PVC is common indoors, while Schedule 80 offers more impact resistance. Remember to use PVC cement for secure joints and follow firestop rules when passing through rated walls.
How to bring conduit through drywall?
Mark your opening, cut it neatly with a hole saw or drywall saw, and install a bushing or connector where the conduit exits. Always check the wall with a stud finder first to avoid pipes or existing wires.
Can you run conduit in residential buildings?
Yes. While Romex (NM cable) is often used in homes, conduit offers better mechanical protection and makes rewiring easier later. It’s especially useful in garages, basements, and areas exposed to potential damage.
How to seal conduit through a wall?
Use an appropriate sealant or firestop material, depending on the wall type:
Exterior walls: silicone, polyurethane, or foam sealant.
Fire-rated walls: firestop putty or intumescent sealant.
How to hold conduit to a wall?
Use metal or plastic conduit straps and clamps spaced according to code. Choose anchors that match your wall type, masonry screws for brick, wood screws for studs, or toggle bolts for drywall.
How to install conduit inside a wall?
Plan the route, drill holes through studs or plates, and secure the conduit with straps or staples before closing up the wall. Avoid drilling through load-bearing beams unless approved by a structural engineer.
Can flexible conduit be used in walls?
Some flexible conduit types, such as FMC (Flexible Metal Conduit) or ENT (“smurf tube”), are allowed in walls. Others, like certain non-metallic flex hoses, may only be approved for exposed locations, always check local code.
How to find conduit in walls?
Use a stud finder with AC detection, a borescope inspection camera, or a cable tracer. Avoid drilling until you’re certain where the conduit runs.
How long will PVC conduit last?
When installed indoors and away from UV light, PVC conduit can last decades, often 50 years or more. Outdoor runs should be UV-rated or painted for protection.
Does conduit have to run underground?
No. Conduit can be run above ground, inside walls, or underground. Underground runs require rated conduits or watertight conduit types like PVC, RMC and DB conduits and must be buried at the correct depth.
Can you run conduit through a firewall?
Yes, but any hole through a fire-rated wall must be sealed with an approved firestop system to maintain its fire-resistance rating.
Is surface wiring legal?
Yes, if the wiring is in approved conduit or armored cable and installed to code. Many workshops and utility rooms use surface-mounted conduit.
How to trace conduit wiring through concrete walls?
A signal tone generator with a tracer probe or a professional pipe-and-cable locator can detect conduit paths inside concrete.
Can you run wires without a conduit?
In some residential cases, yes (e.g., NM cable in open stud bays). But in areas exposed to damage, moisture, or where required by code, conduit is mandatory.
Can I run a low-voltage wire through a PVC pipe?
Yes, you can run low-voltage cables (Ethernet, speaker wire, etc.) through PVC conduit. Keep them separate from high-voltage circuits unless rated for the same enclosure.


