目录
Properly joining electrical conduits is a critical component of any safe and reliable electrical installation. 电气导管 serve as protective channels for wiring, shielding cables from moisture, mechanical damage, chemical exposure, and other environmental stressors. When conduit joints are improperly connected or sealed, the entire system becomes vulnerable, potentially resulting in water ingress, corrosion, insulation failure, electrical shock hazards, or even fire.
In the case of non-metallic conduits, particularly PVC (polyvinyl chloride), the term “gluing” is commonly used, but the actual process is far more technical. This process, known as solvent welding, is a chemical fusion that permanently bonds conduit sections by dissolving and reforming the surface of the plastic. When done correctly, solvent welding creates a watertight, airtight, and structurally strong joint that is essential for both underground and above-ground applications.
Whether you’re a DIYer working on a small project, an apprentice learning the basics, or an experienced electrician following rigorous code requirements, understanding how to glue conduit properly is essential for safe and durable electrical installations.
This Definitive Guide for 2025 offers a comprehensive, step-by-step approach to gluing PVC and other plastic electrical conduits. You’ll learn:
- Which types of electrical conduit are designed to be glued
- The differences between PVC conduit cement, and other adhesives
- The critical role of primer in solvent welding
- How to glue conduit correctly – from preparation to application to curing
- Important code requirements from NEC, CEC, and AS/NZS 3000 Wiring Rules
- Common mistakes and how to avoid them
- Safety tips for long-lasting performance
Whether you’re installing conduit for residential wiring, industrial systems, or solar and data networks, this guide ensures that every glued joint meets the highest standards for durability, safety, and code compliance in 2025 and beyond.
Electrical Conduit Materials and Compatible Adhesives
Before you can begin gluing conduit, it’s essential to understand which types of electrical conduit are compatible with adhesive bonding and what kind of adhesive technology works best. Different conduit materials demand different joining methods, what works for plastic may not be suitable for metal, and vice versa. Choosing the correct adhesive not only ensures mechanical strength but also maintains safety and code compliance.
Types of Electrical Conduit Suitable for Gluing
Electrical conduits are made from different materials, each with specific joining requirements. Some materials can be chemically fused; others must be mechanically joined. Here’s a closer look:
硬质 PVC 导管
硬质PVC导管 is the most commonly glued conduit in the industry. It is made of polyvinyl chloride and widely used for residential, commercial, and industrial electrical systems. Key benefits include:
- Corrosion resistance
- Non-conductive properties
- UV stability and weather resistance (with proper ratings)
- Availability in Schedule 40 and Schedule 80 for different wall thicknesses, and other types of rigid PVC conduits.
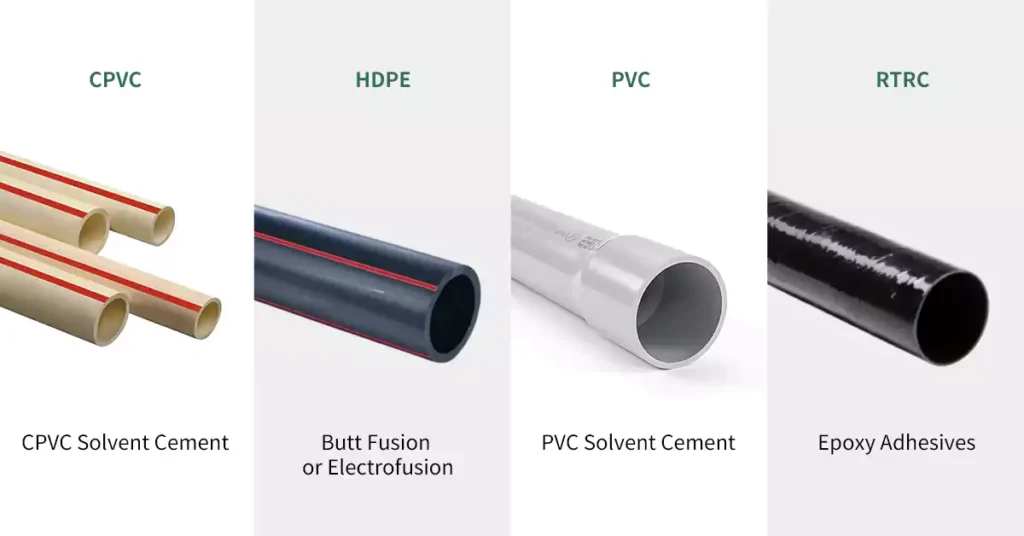
Joining Method: PVC conduit is joined using solvent cement, which chemically fuses the conduit and fittings into one piece. It requires primer to soften the surfaces before applying cement, especially for code-compliant installations.
Common Use Cases: Underground wiring, exposed outdoor runs, concrete-encased installations, and wet locations.
CPVC Conduit
Chlorinated PVC (CPVC) conduit is similar to PVC pipe but designed to withstand higher temperatures and more aggressive chemicals.
- Higher thermal stability makes it suitable for industrial environments.
- Often found in high-temperature or chemical-resistant applications.
Joining Method: Uses CPVC-specific solvent cement, usually orange or yellow. Most installations require primer.
Fiberglass Conduit (RTRC - Reinforced Thermosetting Resin Conduit)
Fiberglass conduit is lightweight, flame-resistant, corrosion-proof, and stable across wide temperature ranges.
- Popular in corrosive, damp, or industrial environments
- Does not deform under heat like plastic
Joining Method: Not compatible with solvent welding. Instead, it uses two-part epoxy adhesives. Surfaces must be cleaned and often sanded before bonding.
HDPE Conduit (High-Density Polyethylene)
HDPE is a flexible, durable plastic conduit used primarily in underground and trenchless installations.
- Resistant to chemicals, shock, and environmental stress cracking
- Can be supplied in long coils for minimal jointing
Joining and Welding: Most common for large installations (e.g., butt fusion or electrofusion)
⚠ENT (Electrical Nonmetallic Tubing)
耳鼻喉 is a lightweight, corrugated plastic conduit used in walls and ceilings.
- Typically joined using snap-lock or mechanical fittings
❌ Metal Conduits (EMT, IMC, RMC)
Electrical Metallic Tubing (EMT), Intermediate Metal Conduit (IMC), and Rigid Metal Conduit (RMC) are never glued. These systems rely on:
- Threaded or compression-type fittings
- Mechanical locking systems
- Continuous electrical conductivity for grounding
Choosing the Right Adhesive
To ensure a secure and lasting connection, consider these factors:
- PVC: Use solvent cement formulated for PVC
- CPVC: Use CPVC-rated solvent cement
- 玻璃纤维: Use two-part epoxy resin systems
- HDPE: Use specialized bonding agents (e.g., BonDuit)
Using the wrong type of cement, like applying PVC cement to HDPE, won’t just create a weak joint; it won’t bond at all.
Conduit Adhesive Compatibility
导管类型 | 材料 | Joining Method | Adhesive Type |
硬质 PVC | Plastic | Solvent Welding | PVC Cement |
CPVC | Plastic | Solvent Welding | CPVC Cement |
Fiberglass (RTRC) | Composite | Epoxy Adhesive | Two-part epoxy |
高密度聚乙烯 | Plastic | Fusion / Adhesive | 融合 |
Flexible PVC (ENT) | Plastic | snap-lock or mechanical fittings | 不适用 |
EMT / IMC / RMC | Metal | Threaded/Compression | 不适用 |
Solvent Welding vs. Adhesive Bonding
When it comes to joining plastic conduits, two common methods are used: solvent welding and adhesive bonding. While they may seem similar at a glance, they work in very different ways, and choosing the right method is essential for a safe, lasting connection.
Solvent Welding - A Chemical Fusion Process
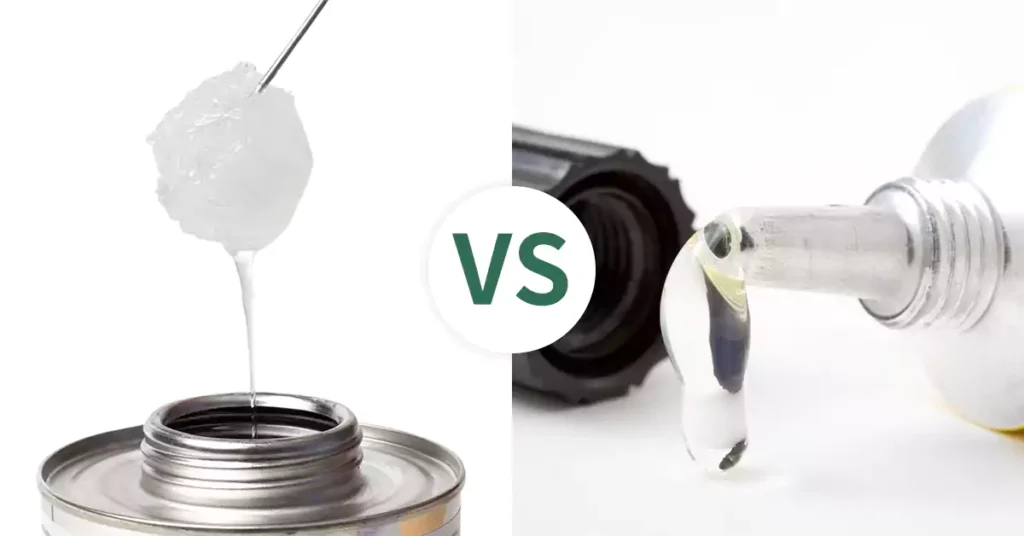
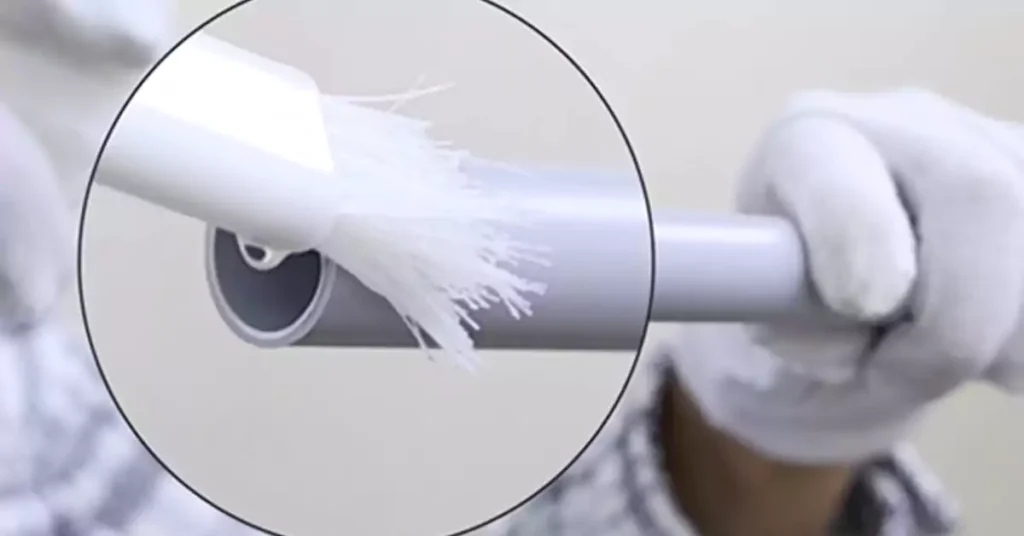
Solvent welding is a method used primarily for PVC and CPVC conduit systems. It doesn’t rely on sticky glue. Instead, it uses a solvent cement to chemically soften and dissolve the surfaces of the conduit and fitting. Once pressed together, the materials melt and fuse into one solid piece. As the solvent evaporates, the two parts become a permanent, molecularly bonded joint, essentially a “cold weld.”
- The bond is as strong as the conduit itself
- Joints are watertight and permanent
- Common in plumbing and electrical conduit systems
Once cured, solvent-welded joints cannot be pulled apart, they must be cut to be disassembled.
Adhesive Bonding - A Surface Bonding Process
Adhesive bonding is used when solvent welding isn’t possible, such as with fiberglass (RTRC) or HDPE conduit. Instead of fusing the base materials, this method uses an adhesive layer (like epoxy or resin) that sticks to the surface of each part.
- The joint remains two separate pieces held together by the adhesive
- Ideal for materials that don’t react to solvents
- Requires proper surface cleaning or preparation
While not as integrally fused as solvent-welded joints, a properly applied adhesive bond can be structurally strong and waterproof, especially when using materials designed for the conduit type.
Essential Pre-Gluing Preparation for Joint Integrity – 6 Tips
Before any solvent cement is applied, successful conduit bonding begins with thorough preparation. Skipping or rushing these steps is one of the leading causes of joint failures, leaks, and code violations. Whether you’re working with rigid PVC, CPVC, or other solvent-weldable conduits, the integrity of the joint depends as much on the preparation as it does on the adhesive itself.
Safety Considerations
Solvent cements and primers used for conduit installation contain flammable, fast-evaporating chemicals. These chemicals are necessary for solvent welding but present risks if used without proper precautions.
To protect yourself and others on the jobsite, always observe these essential safety practices:
Wear Personal Protective Equipment (PPE):
Gloves: Use chemical-resistant gloves to avoid skin irritation or absorption.
Eye protection: Always wear safety goggles or a face shield to prevent splashes into the eyes.
Long sleeves and pants: Avoid direct skin contact with solvents and adhesives.
Work in Well-Ventilated Areas:
Use cements and primers only in areas with good airflow to disperse fumes and reduce inhalation risks.
For enclosed spaces (e.g., crawlspaces, basements, tunnels), consider mechanical ventilation or portable fume extractors.
Inhaling high concentrations of solvent fumes can cause dizziness, headaches, nausea, or long-term health effects. Never work with open cans of primer or cement in a confined space without airflow.
Fire and Ignition Hazards:
Keep all primer and cement away from open flames, sparks, or hot surfaces.
Store chemicals in approved containers, away from heat sources.
Do not smoke near the application area.
Cutting the Conduit Square and Clean
A proper cut is the starting point for every reliable joint. If the conduit end is jagged, uneven, or angled, the bonding surfaces won’t meet uniformly—resulting in an uneven solvent weld.
- Use a PVC ratchet cutter, fine-toothed saw, or conduit cutter designed for the material.
- Ensure the cut is square (perpendicular) to the conduit’s length. Angled cuts reduce bonding surface area and create stress points.
- Do not use rough or worn tools that leave burrs or melt the conduit edge. This compromises both the surface and the fit.
Deburring and Beveling the Conduit End
After cutting, the next step is deburring. Removing the sharp or ragged edges and optionally beveling the outer edge to aid insertion and solvent distribution.
Deburring:
Use a deburring tool, utility knife, or file to smooth both the inner and outer edges of the conduit.
This reduces friction during assembly and prevents shavings from interfering with the chemical bonding process.
Beveling or Chamfering:
For conduit diameters 2″ and above, beveling the outer lip of the conduit at a 15°–30° angle is strongly recommended.
This helps distribute cement evenly and prevents “push-back,” where wet cement is scraped away during insertion.
Dry-Fitting the Joint for Proper Alignment
Before applying any primer or cement, the conduit and fitting should be test-fit to ensure correct alignment and fit.
How to Dry-Fit:
Insert the conduit fully into the fitting without cement.
It should seat snugly with minimal resistance but still be pushable by hand.
Ensure the insertion depth reaches the internal stop point of the fitting.
If the joint is too loose or too tight, re-check for roundness, cleanliness, or manufacturing tolerances. Loose fits lead to weak bonds; overly tight fits can scrape away adhesive during assembly.
Cleaning the Bonding Surfaces
Even small amounts of dirt, oil, or moisture can interfere with chemical fusion during solvent welding. That’s why both the conduit and fitting surfaces must be clean and dry.
- Wipe the mating surfaces with a clean, lint-free rag or paper towel.
- For oily or contaminated conduit, use PVC cleaner or denatured alcohol (not acetone) to remove grease or residue.
- Allow surfaces to fully dry before applying primer or cement.
Do not attempt to glue wet or visibly soiled conduit. This creates weak, bubbly, or incomplete joints.
The Role of Primer
For most solvent welding systems, especially PVC and CPVC, primer plays a critical role in ensuring a chemical fusion by:
- Softening the plastic surfaces
- Opening the pores of the material for solvent penetration
- Removing residual contaminants missed during cleaning
How to Apply Primer:
Use a primer-approved applicator (often attached to the lid) to coat the entire mating surface of the conduit and fitting socket.
Apply even, complete coverage, extending slightly beyond the area where the cement will be applied.
Allow a few seconds for the primer to soften the material before applying cement.
Look for color-coded primer (e.g., purple) for visual confirmation. Many jurisdictions require primer for electrical and plumbing installations.
Step-by-Step Gluing Process for Electrical Conduit
Once you’ve selected the correct adhesive and thoroughly prepared the conduit and fittings, it’s time to execute the gluing process, more precisely known as solvent welding. This stage determines the long-term strength, watertightness, and code compliance of the joint.
Even the best cement won’t compensate for rushed technique or missing steps. Follow these instructions closely to ensure professional-grade results.
1. Confirm All Preparations Are Complete
Before opening the cement:
The conduit must be square-cut, deburred, and beveled
The fitting and conduit must be clean and dry
The parts must have been dry-fitted to confirm proper fit
Primer has been properly applied (if required)
2. Apply the Primer (If Required)
Most PVC and CPVC conduit installations require the use of primer.
Use a primer applicator (often built into the can’s cap).
Apply an even coat to the outside of the conduit end and the inside of the fitting socket.
Let the primer sit for a few seconds to soften the surface.
Do not touch or wipe the primed area after application.
Use purple primer if local code requires visual verification of use.
3. Apply the Solvent Cement
Now, immediately after priming, apply the cement while surfaces are still soft.
Step-by-Step Cement Application:
Stir the cement if it has been sitting to ensure smooth consistency.
Apply a full, even coat of cement to the outside of the conduit:
Cover the insertion depth completely
Don’t apply excess that drips or pools
Quickly apply a thin coat to the inside of the fitting:
Avoid applying too much; it may block the conduit interior
Work quickly: Solvent cement sets fast, you have about 15–30 seconds to assemble the joint after cement application.
4. Assemble the Joint Immediately
Insert the conduit into the fitting with a twist to evenly spread the cement.
Push until the conduit bottoms out at the fitting stop.
Hold the joint together firmly for 30 seconds or more time:
This prevents push-back or separation as the solvent sets.
Don’t twist after full insertion, this weakens the bond.
5. Wipe Away Excess Cement
Use a clean rag to wipe away any excess cement squeezed out around the joint.
This improves appearance and prevents solvent from weakening surrounding material.
Never reuse excess cement or allow it to drip inside the conduit—it can damage wire insulation later.
6. Allow Proper Cure Time
Solvent-welded joints require time to cure before handling, backfilling, or pulling wire. Cure time generally depends on temperature, humidity, and pressure, here are some general requirements based on relative humidity of 60% or less :
导管尺寸 | Temperature | Minimum Cure Time Before Pulling Wire or Backfill (Non-Pressurized) |
1/2” – 1” | 60°F – 100°F | 15–30 minutes |
1-1/4” – 2” | 60°F – 100°F | 30–60 minutes |
≥3″ | 60°F – 100°F | 1–2 hours |
Any Size | Below 40°F (4°C) | At least double the normal time (up to 24 hrs recommended) |
For installations subject to pressure (e.g., shared plumbing trench), allow at least 24 hours of curing.
Always follow the manufacturer’s recommended cure times on the cement can for best results.
Pro Tips from the Field
- For vertical conduit runs, assemble bottom-up to prevent solvent drips onto lower joints.
- Keep caps on primer and cement cans to prevent evaporation and fire hazards.
- Never reuse cement from one fitting to another, always use fresh, clean cement per joint.
- Don’t rush. A perfect glue job takes just a few extra minutes but saves hours of rework.
守则合规性
A proper solvent-welded electrical conduit joint isn’t just about structural strength—it must also meet national and regional electrical code requirements for safety, durability, and long-term system performance.
Whether you’re working under the National Electrical Code (NEC) in the U.S., the Canadian Electrical Code (CEC) in Canada, or the AS/NZS 3000 Wiring Rules in Australia and New Zealand, gluing conduit is considered a regulated process. Failure to comply can result in failed inspections, safety hazards, or system downtime.
National Electrical Code - U.S.
NEC doesn’t not directly set the requirements for solvent welding, but for rigid PVC conduit in Article 352, it outlines the requirements for joints, and for PVC conduits like Schedule 40 and 80, joining conduit sections or fittings, should ensure secure bond, Primer and solvent cement use are considered mandatory for Schedule 40/80 PVC joints unless specifically exempted by the manufacturer.
Canadian Electrical Code - Canada
Section 12 of CEC states that for rigid PVC conduit joining and fittings such as elbows and couplings’ joining, PVC solvent cement is required to ensure secure bonds and connections.
AS/NZS 3000: Wiring Rules - Australia/ New Zealand
The standard requires the conduit joints to be securely made and capable of preventing moisture ingress, to ensure this, PVC solvent cement or glue are always the option.
Conduit and Cement Must Be Code-Listed
To comply with electrical codes, both conduit and solvent cement must be:
- Third-party listed or certified (e.g., UL, CSA, or AS/NZS-certified)
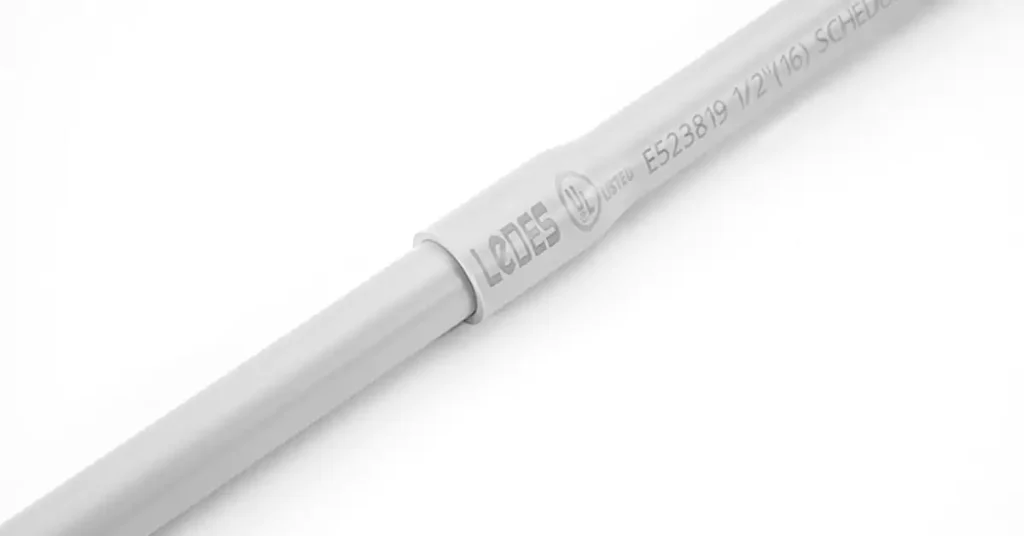
- Labeled with the appropriate standard reference
- Installed according to the manufacturer’s guidelines, which are treated as code by enforcement authorities
专业提示: Want to know more about electrical codes for PVC conduit in North America and Australia? You can click on the following links to your country for the electrical code compliance details:
Primer Use
Primer use is frequent inspection issue, some do apply primer before solvent welding while some not, but many local inspectors require visible evidence of primer use, especially for outdoor, underground, or critical installations.
Wet Location & Underground Considerations
All codes require that joints in wet, damp, or underground environments be watertight. Improperly glued joints can result in:
Water ingress, leading to conductor corrosion
Insulation degradation
Electric shock or short circuit hazards
To ensure compliance:
Use “wet condition” solvent cements
Follow cure time requirements before backfilling or energizing circuits
Seal entrances to boxes or enclosures with approved fittings
7 Commons Gluing Mistakes to Avoid
Even with the right tools, materials, and adhesives, improper technique or skipping key steps can cause conduit joints to fail, leading to costly rework, safety hazards, or failed inspections.
1. Skipping Surface Preparation
Mistake:
Failing to properly clean, deburr, or bevel the conduit before applying primer and cement.
Dirt, grease, and burrs prevent proper bonding. Beveling ensures smooth insertion and even cement distribution. A dry or contaminated surface leads to weak welds, leaks, and code violations.
How to Avoid:
Always clean conduit and fitting with a lint-free cloth or PVC cleaner.
Deburr and bevel conduit ends.
Don’t assume “new out of the box” means clean, factory residues or dust may still be present.
2. Forgetting or Improperly Applying Primer
Mistake:
Skipping primer or applying it lightly or unevenly.
Primer softens the plastic for chemical fusion. Without it, the solvent cement cannot properly “melt” the surfaces to bond as one. This results in brittle or easily-separated joints.
How to Avoid:
Use a generous, even coat of primer on both the conduit and the fitting socket.
Let the primer sit for a few seconds to activate the surface.
Use purple primer when visual verification is required.
3. Using the Wrong Cement Type
Mistake:
Applying general-purpose PVC cement or plumbing cement not rated for electrical use. Or use CPVC cement for PVC conduit.
Only UL-listed or CSA-certified cements rated for electrical conduit provide the performance and fire-resistance required by code. Incorrect cement may set too quickly, bond poorly, or fail to resist environmental stresses.
How to Avoid:
Use conduit-specific, code-compliant solvent cement.
Choose viscosity (regular, medium, heavy body) based on pipe size.
Use fast-set, all-weather, or wet-condition formulas as needed.
4. Rushing the Cement Application
Mistake:
Not covering the full bonding surface or allowing cement to begin setting before joining.
Solvent cement begins evaporating immediately. Delays can cause dry spots or weak partial bonding, especially on large-diameter conduit.
How to Avoid:
Apply cement to both parts promptly and assemble immediately.
Insert the conduit with a twist and push to the full stop.
Don’t apply cement to both ends and then pause, complete one joint at a time.
5. Inadequate Joint Holding Time
Mistake:
Letting go of the joint too soon after assembly.
If not held firmly in place, conduit may push back out slightly as air pressure or solvent resistance builds, weakening the seal or misaligning the joint.
How to Avoid:
Hold the joint for at least 30 seconds.
Observe the fitting for any rebound before releasing.
For large vertical conduits, use clamps or bracing to hold joints until cured.
6. Inadequate Cure Time
Mistake:
Pulling wire, energizing the system, or backfilling too soon.
Why It’s a Problem:
Even though the cement sets in minutes, it needs proper cure time to develop full strength. Early mechanical stress (like pulling wires) can break the bond before it hardens.
How to Avoid:
Refer to manufacturer instructions based on size and temperature.
Use minimum cure times as required.
When in doubt, wait longer, especially in cold or humid conditions.
7. Improper Storage and Handling of Cement
Mistake:
Using old, thickened, or improperly stored solvent cement.
Why It’s a Problem:
Solvent-based cements degrade over time. Exposure to air thickens the formula, reducing penetration and bonding effectiveness.
How to Avoid:
Check expiration date and storage instructions.
Keep lids tightly closed when not in use.
Store cement in a cool, dry, ventilated area, away from heat and flames.
How to Ensure Long-Term Performance of Electrical Conduit Systems
A well-glued electrical conduit joint is just one essential part. For maximum system longevity and safety, electrical professionals must also consider installation environment, inspection practices, system design, and ongoing maintenance. These factors play a critical role in how long the conduit system performs under load, stress, and real-world environmental conditions.
1. Allow Full Curing Before Load or Backfill
Even though conduit doesn’t carry pressurized fluid like plumbing, it is still subject to:
Wire pulling tension
Expansion and contraction
Vibrations and ground movement (underground)
Always allow sufficient cure time based on pipe size and ambient conditions before pulling cables, backfilling trenches and mounting conduit.
2. Protect Against Environmental Stress
Once installed, conduit joints face long-term exposure to:
UV radiation (for outdoor runs)
Temperature fluctuations
Ground movement or vibration
Moisture or chemical exposure (industrial/underground)
To reduce degradation over time:
Use UV-resistant conduit and fittings
Ensure proper burial depth and bedding in underground installs
Use flexible expansion couplings to accommodate temperature changes
Avoid placing solvent-welded joints in locations with constant vibration or thermal cycling
3. Follow Support and Expansion Requirements
All major electrical codes specify conduit support spacing and expansion allowances, which, if ignored, can cause stress fractures at glued joints over time.
4. Avoid Mixing Incompatible Materials
Long-term joint performance can be compromised by mismatched components.
Do not join PVC conduit to HDPE, fiberglass, or metal using standard PVC cement, use plumbing-grade cement not rated for conduit and install fittings that don’t have matching UL/CSA listings.
5. Maintain Access for Future Modifications
Glued joints are permanent and cannot be disassembled, only cut. Plan installations with future needs in mind:
Install accessible junction boxes at key points
Leave slack or pull boxes for future cable upgrades
Label conduits clearly to avoid confusion or unnecessary cuts later
结论
Gluing electrical conduit may appear straightforward, but it plays a vital role in the safety, reliability, and longevity of an electrical system. When done correctly with the right materials, proper technique, and full code compliance, it creates permanent, watertight joints that stand up to mechanical stress, environmental exposure, and the test of time.
Whether you’re a beginner learning the craft or a professional refining your practices, understanding the science behind solvent welding, following precise installation steps, and respecting curing conditions will ensure that your conduit system performs as intended. In modern electrical infrastructure, lasting connections aren’t just about making things stick, they’re about building systems you can trust.
常见问题解答
Does electrical conduit need to be glued?
Yes. Nonmetallic electrical conduit such as rigid PVC typically requires gluing (solvent welding) to create permanent, watertight joints. This is especially important in outdoor, underground, or damp locations.
What glue do you use for electrical conduit?
You must use PVC solvent cement that is UL-listed or CSA-certified for electrical applications. These are different from general-purpose or plumbing-grade cements.
Can you use regular PVC glue on electrical conduit?
Only if it’s rated for electrical use. Plumbing PVC glue may not meet the flammability, UV resistance, or joint strength required for conduit systems. Use conduit-specific solvent cement for compliance and safety.
How do you glue PVC electrical conduit?
- Cut and deburr the conduit.
- Clean the surfaces.
- Apply primer (if required).
- Apply solvent cement to both the conduit and the fitting.
- Insert the conduit with a twist, and hold it in place for 30 seconds.
- Allow sufficient cure time before handling or wire pulling.
Does an electrical PVC conduit need to be glued at every joint?
Yes, unless the conduit is being joined with listed mechanical couplings or is a flexible type that uses snap-lock or compression fittings. All rigid joints must be glued unless otherwise specified.
How do you connect two pieces of PVC conduit?
Use a conduit coupling and solvent weld both ends following the proper gluing process with primer and cement.
Why is my PVC glue not working?
Common causes include:
Using expired or thickened cement
Failing to use primer
Applying glue to dirty or wet surfaces
Not holding the joint long enough
Not allowing proper cure time
Can grey and white PVC be glued together?
It depends on the materials. Grey PVC is typically for electrical use, and white PVC for plumbing. If both are PVC Type I, they can be solvent-welded using appropriate cement, but it’s not recommended to mix electrical and plumbing materials in code-regulated systems.
What glue should you use to connect PVC to black ABS?
Generally, PVC and ABS are not supposed to be glued together, but you can use a transition cement specifically designed to bond PVC to ABS, whether you can use it or not depends on your local code requirements.
What’s the difference between PVC glue and PVC cement?
They are often used interchangeably, but PVC cement is the correct term. It’s not a true glue, it chemically softens and fuses the plastic, creating a permanent joint. “Glue” implies adhesion; “cement” implies solvent welding.
How do you take apart glued PVC conduit?
You cannot unglue solvent-welded PVC. The joint becomes permanent. To separate, you must cut the conduit and use new fittings to reconnect.
Can I use white PVC pipe as an electrical conduit?
Only if it is listed and labeled for electrical use. White PVC is typically plumbing-grade and does not meet electrical code requirements for wiring, which can cause safety hazards.
Is PVC glue watertight?
Yes, properly applied solvent cement creates a watertight seal. However, environmental conditions and improper technique can cause failures, especially underground.
Can I use grey electrical PVC for water piping?
No. Grey PVC conduit is not pressure-rated or certified for drinking water systems. Use white Schedule 40/80 PVC marked for potable water for plumbing.
Will PVC cement work on CPVC?
No. CPVC requires its own cement, typically labeled for high-temperature or CPVC systems. Using PVC cement on CPVC can result in a weak or non-compliant bond.